
Steaming milk at home can seem intimidating, but with a few essential techniques, it becomes a delightful part of making your favorite coffee drinks. Whether you prefer a creamy latte, frothy cappuccino, or strong macchiato, mastering milk steaming is crucial. The Breville Barista Express is an exceptional tool to help you achieve professional-quality steamed milk in your kitchen. Follow this step-by-step guide to perfect your milk-steaming technique. Discover the advanced features and performance of this machine in our Breville Dual Boiler BES920XL review
Why Steamed Milk Enhances Your Coffee Experience
Steamed milk doesn’t just add foam—it transforms your coffee. The process of steaming milk creates microfoam, which consists of tiny, velvety bubbles that enhance the texture and flavor of your drink. This silky foam balances the bold espresso flavors, elevating your coffee into a luxurious experience. Learn about the ease of use and innovation in our Breville Barista Touch Impress review
Preparing the Breville Barista Express for Steaming
The Breville Barista Express (or Sage Barista Express in the UK) is a favorite among home baristas for its user-friendly design and versatility. Its efficient steam wand allows you to achieve café-quality results with minimal effort and practice. Compare these two popular models in our Breville Barista Express Impress vs Pro review

Essential Tools for Milk Steaming
Before you start steaming milk, make sure you have these tools ready:
- Breville Barista Express with steam wand
- Cold milk (whole milk for richness or barista-style plant-based options)
- Stainless steel milk jug (helps control temperature)
- Optional thermometer (to monitor milk temperature)
Step 1: Preparing Your Machine
Start by ensuring your Breville Barista Express is fully preheated. Wait until the steam function light indicates readiness, then let it sit for an extra minute to ensure optimal steam temperature.
Purge the steam wand by turning the steam dial briefly to release any condensation. This step ensures pure steam for your milk. Find out which machine suits you better in our Breville Barista Pro vs Express review
Step 2: Preparing the Milk
Fill your milk jug about one-third full with cold milk. Using cold milk allows more time to achieve the desired texture before overheating. Whole milk creates the creamiest foam, but if you’re using plant-based options, choose barista-grade varieties for better frothing.
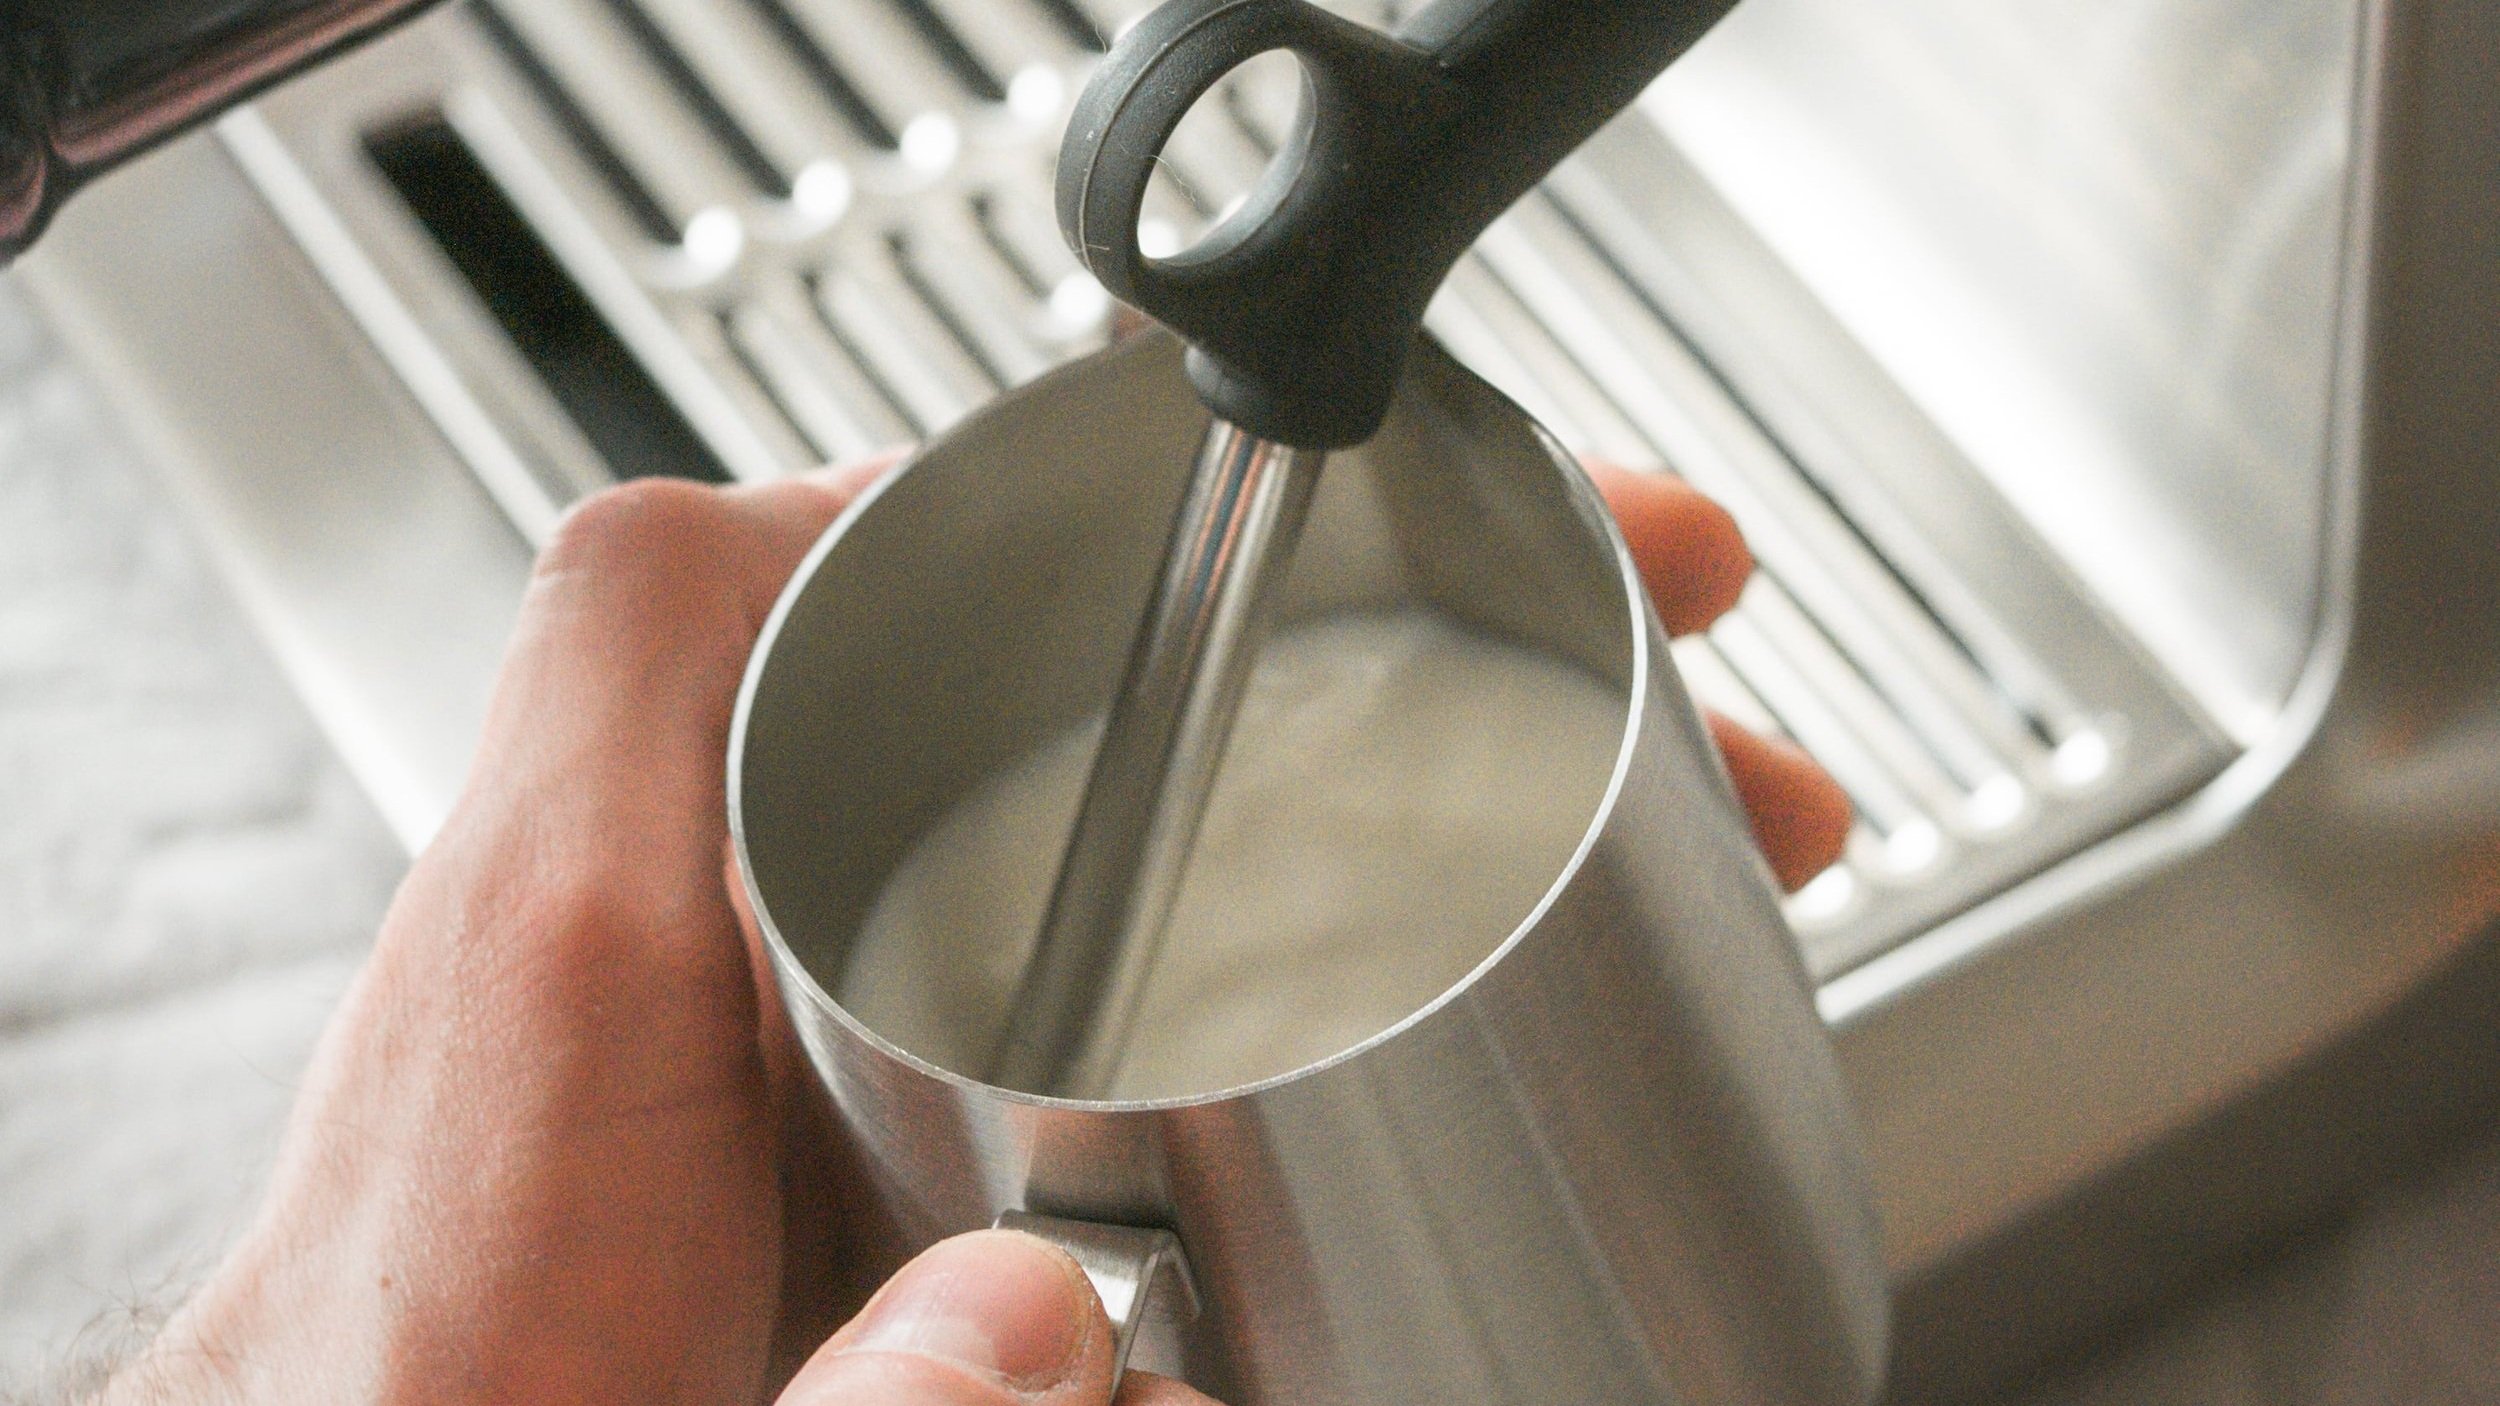
Step 3: Positioning the Steam Wand Correctly
Proper wand positioning is key to creating perfect microfoam. Submerge the steam wand tip just below the milk's surface at a 15-20 degree angle. This creates a whirlpool effect that breaks larger bubbles into finer microfoam.
Tilt the milk jug slightly and position the wand near the jug’s edge to maintain a consistent vortex for even heating and foam integration.
Step 4: Steaming Your Milk
Turn on the steam and listen for a gentle hissing sound—this indicates air is being introduced during the “stretching” phase. Keep the wand tip just below the surface to avoid splashing while adding air.
After 5-10 seconds, lower the jug to submerge the wand fully. This begins the “texturing” phase, heating the milk and integrating the foam. Maintain a swirling motion to achieve a glossy, smooth microfoam.
The process should take 20-30 seconds. If using a thermometer, aim for a milk temperature of 150°F (65°C). If gauging by touch, stop steaming when the jug feels too hot to hold comfortably. Explore the key differences between these premium machines in our Breville Oracle vs Oracle Touch review
Step 5: Cleaning and Perfecting the Texture
Once steaming is complete, turn off the steam and clean the wand with a damp cloth. Purge the wand again to clear any milk residue.
To refine the texture, tap the milk jug gently on the counter to break any large bubbles. Swirl the jug to blend the milk and foam, creating a glossy, silky consistency.
Step 6: Pouring Steamed Milk into Your Coffee
The pouring technique impacts both presentation and flavor balance. Begin with a slow, controlled pour close to the espresso surface to mix the milk evenly. As the cup fills, raise the jug slightly and pour more quickly to add a foamy layer on top. With practice, you can experiment with latte art for a creative finish.
Troubleshooting Common Milk Steaming Challenges
Steaming milk takes practice. Here are common issues and solutions:
- Milk Won’t Froth: Ensure you’re using cold, whole milk or barista-grade alternatives. Keep the wand tip slightly below the surface to incorporate air effectively.
- Large Foam Bubbles: Prevent over-aeration by avoiding excessive splashing and keeping the steam wand steady.
- Overheated Milk: Use a thermometer or stop steaming when the jug feels too hot to touch comfortably.
Conclusion
Mastering milk steaming on the Breville Barista Express is a rewarding skill that enhances your coffee-making experience. By focusing on air incorporation and temperature control, you can achieve silky microfoam for café-quality drinks at home. Embrace the process, and soon you’ll be crafting perfect coffee creations in your own kitchen. Happy steaming!